|
|
|
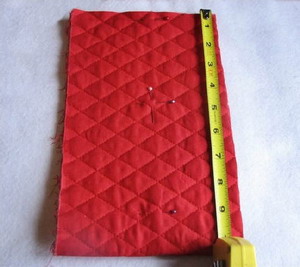
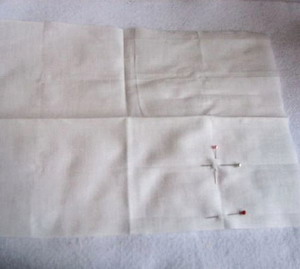
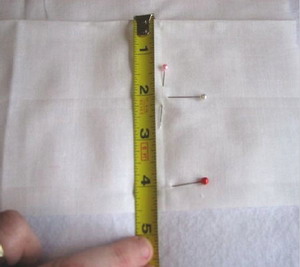
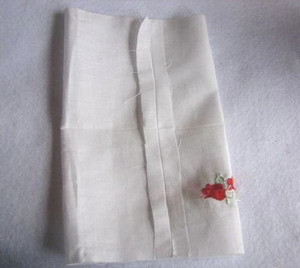
Step 1: Fold the double sided quilt fabric in half. Mark with a pin or fabric marker ½ inch from the top (this is your seam allowance). Mark 1½ inch from the bottom and in the center from the 2 pin marks.
|
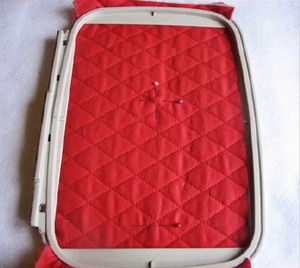
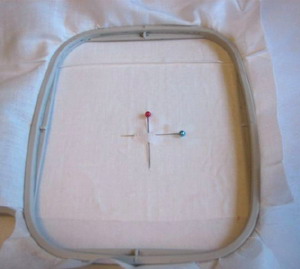
Step 2: Hoop fabric and stabilizer,* centering the cross pins. Removing the top pin will be necessary for hooping. *Stabilizer is optional‐ this fabric is sturdy enough without it to embroidery the redwork design on.
|
|
|
|
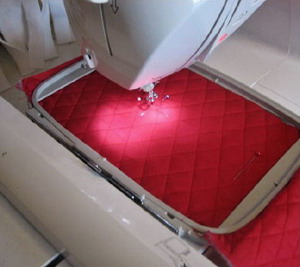
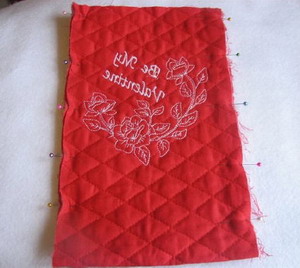
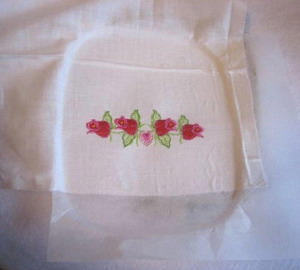
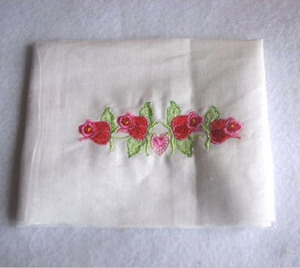
Step 3: Line the needle up with the cross pins to center design. Remove remainder pins before starting the embroidery design. When finished remove fabric and stabilizer from hoop and tear away the stabilizer.
|
Step 4: Fold fabric in half, right sides together and pin sides together. Sew a ¼ inch seam allowance on the two sides.
|
|
|
|
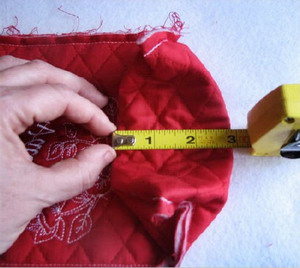
Step 5: You'll need approximately 3 inches for the bottom. Flatten the fabric out and measure.
|
Step 6: Pinch the corners in a triangle shape and measure 1 ½ inches. Baste‐stitch in place.
|
|
|
|
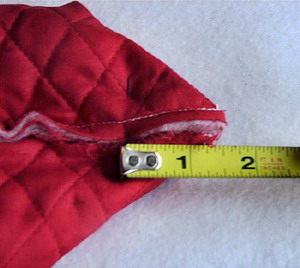
Step 7: Cut the corners off to ¼ inch of the baste stitch.
|
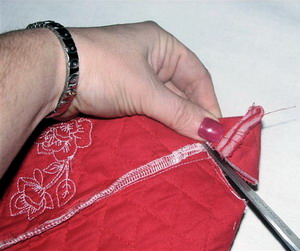
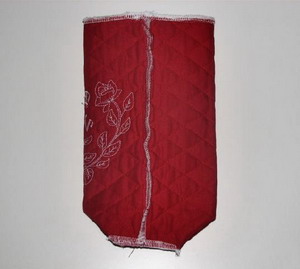
Step 8: (Optional) Serge or zigzag the edges on the sides of the bag and the 2 corners (do last) for a more finished look. Turn the bag inside out so the design is showing. Set aside for later.
|
|
|
|
Step 9: Cut 1 piece of white fabric to 9 inches x 13 inches. Fold fabric in half lengthwise and iron, then fold in half widthwise and iron. Now you see 4 squares. You'll be working in the bottom right square if adding a design on the top.
|
Step 10: Measure ½ inch from the bottom and pin or mark (this will be the seam allowance). Mark the center distance 2 inches between the top fold and the pin‐this will be the center for your design.
|
|
|
|
Step 11: Spray adhesive on back of white fabric and attach it to the stabilizer. Hoop both pieces with cross pin or marks in the center of the hoop. Spray helps keep fabrics from moving. Remove pins and sew out design.
|
Step 12: When the design is finished, remove the fabric and stabilizer from the hoop. Remove stabilizer from the back of the fabric.
|
|
|
|
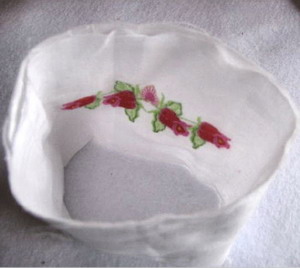
Step 13: Fold the fabric in half and sew a ½ inch seam allowance. Press open with the iron. This will be in a cylinder shape.
|
Step 14: Take the top of the cylinder shaped white fabric and fold it down. Now the design is on the outside. You have a finished top and the raw edge is on the bottom.
|
|
|
|
Step 15: Turn the white cylinder piece of fabric inside out. Now the design is upside down.
|
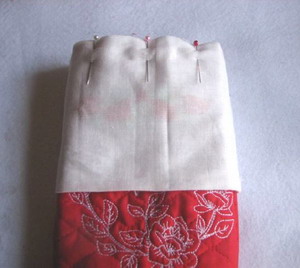
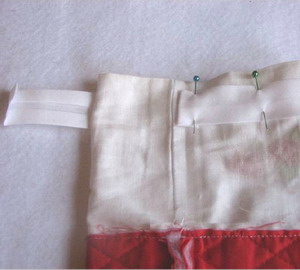
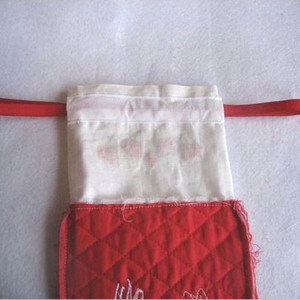
Step 16: Place the white fabric piece on the outside of the finished quilted fabric. Facing both designs to each other, pin in place. Sew ½ inch around the cuff, being careful not to catch the rest of the bag while sewing it together. Serge the edges for a more finished look (optional).
|
|
|
|
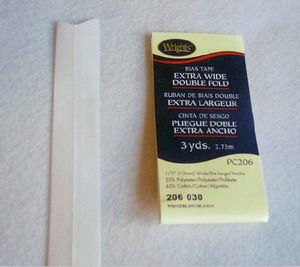
Step 17: Take the bias tape and iron it flat. This will be the casing for the drawl string ties.
|
Step 18: Cut 2 pieces of the bias tape 6½ inches long. Lay the bag flat so you can see both side seams. Fold the bias tape ends under ½ inch and press with iron. This will be the opening for the drawstring. Pin in place ½ inch from the top fold on the inside of the bag. Pin the folded side down close to, but not touching the side seam. You will do this to both sides. Being sure not to touch the embroidery design on the other side. Stitch in place‐sew the top and top of the bias tape close to the edges to form the casing.
|
|
|
|
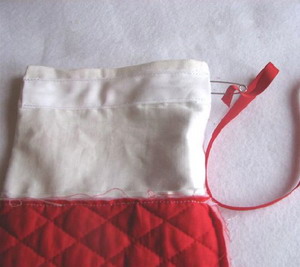
Step 19: Place a safety pin on the ribbon or cord (30 inch length) and pull all the way through both side of the bias tape.
|
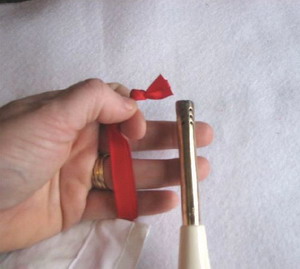
Step 20: Once the string is all the way through the casing tie ribbon or cord in a knot and burn edges with a lighter to keep them from fraying.
|
|
|
|
Step 21: Pull the ribbon out both sides making sure the knot is in the middle of the casing.
|
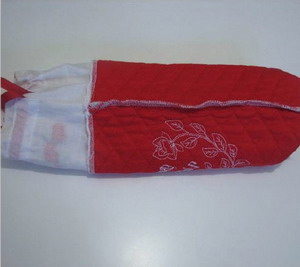
Step 22: The inside of the bag is now finished. Turn the bag inside out and press.
|