|
|
|
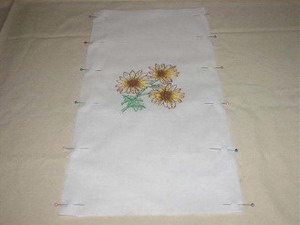
Step 1: Cut 2 pieces of white fabric 9 x 23 inches. Hoop tear away stabilizer.
|
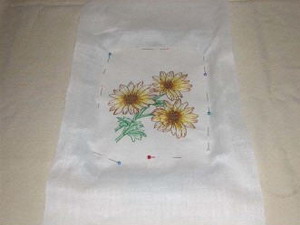
Step 2: Embroider the design. When finished, remove the fabric from the hoop. Tear the stabilizer off. Press with an iron.
|
|
|
|
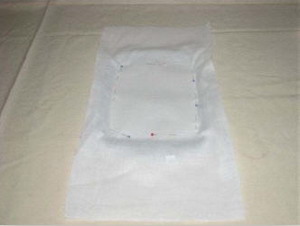
Step 3: Lay the embroidered piece of fabric on top of the second piece of white fabric, wrong sides together.
|
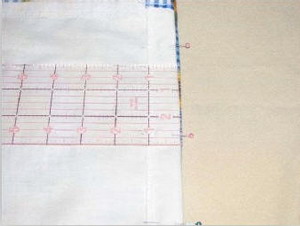
Step 4: Pin the sides of the white fabric and sew up the side edges with a ½ inch seam allowance.
|
|
|
|
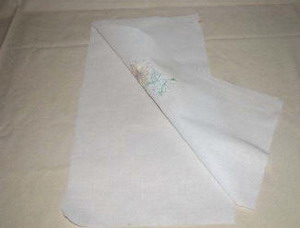
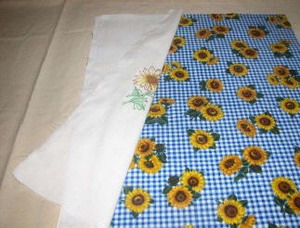
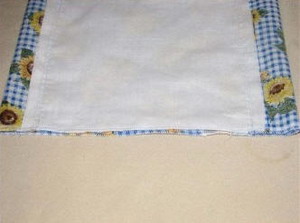
Step 5: Cut one piece of the coordinating fabric 17 x 23 inches. Lay the white embroidered fabric on top, right sides facing together.
|
Step 6: Pin the edges together on both sides of the white fabric. Sew up the edges, leaving a 5/8 inch seam allowance.
|
|
|
|
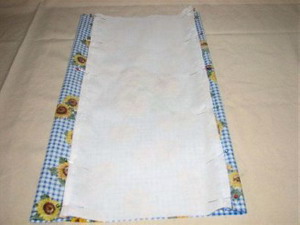
Step 7: Turn the sewn fabric inside out and press with an iron.
|
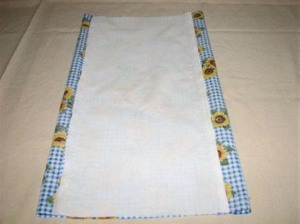
Step 8: Serge or zigzag both the top and bottom edges of the baggy holder for a more finished seam.
|
|

|
|
Step 9: Press the serged edge of the fabric 1 inch toward the inside of the baggy holder.
|
Step 10: Sew a 5/8 inch seam along the open edge. This will be the casing. Leave a 1 ½ inch opening for the elastic. Repeat this step for the other end.
|
|
|
|
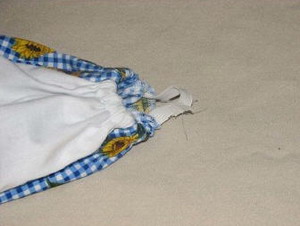
Step 11: Take a piece of the elastic (6 ½ inches long) and put a safety pin on the end. Run it through the bottom casing. Stitch both ends of the elastic together. Baste closed the opening used for inserting the elastic. Optional: You can repeat this step at the other end of the bag, and stitch a piece of ribbon to the top inside the baggy holder to hang the baggy holder on or … continue with next step.
|
Step 12: Take a piece of 3/8 inch grosgrain ribbon (18 inches long) and insert it into the casing, using the safety pin. Pull the ribbon through, leaving an equal amount of ribbon on both sides.
|
|

|
|
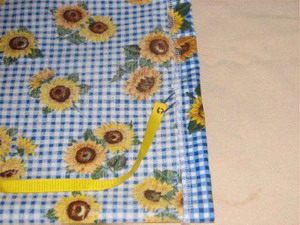
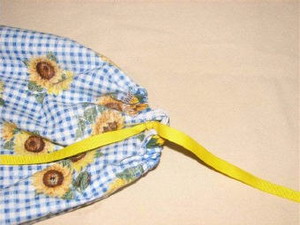
Step 13: Pull the ribbon together and gather up the fabric casing as tightly as possible. Tie a knot in the ribbon.
|
Step 14: Baste closed the opening for inserting the ribbon. Tie the two ends of the ribbon together with a knot for hanging the baggy holder from.
|
|
|
|
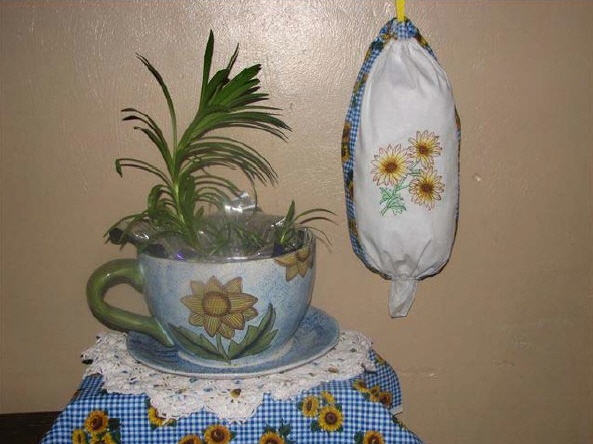
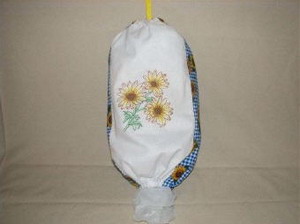
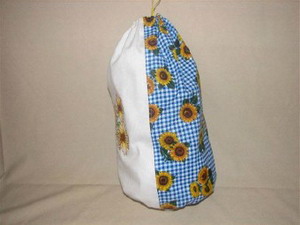
Enjoy your beautiful new baggy holder!
|