|

|
|
Step 1: Cut two pieces of black fabric 10 x 20 ½ inches. This is for the top edge of the pillow case. Set one piece aside.
|
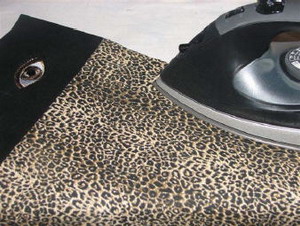
Step 2: Fold black fabric in half long ways and press with iron. The folded edge will be the finished edge of the pillow case. The fabric should measure 5 inches x 20 ½ inches.
|
|
|
|
Step 3: While fabric is still folded, mark the center and also mark 5 ½ inches from both edges. This is where the designs will go.
|
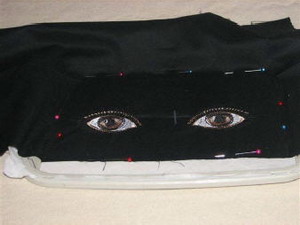
Step 4: Hoop the tearaway stabilizer. I spray the back of the black fabric with spray stabilizer and center mark on hoop. I also pin in place for extra stability. Embroider the first set of eyes.
|
|
|
|
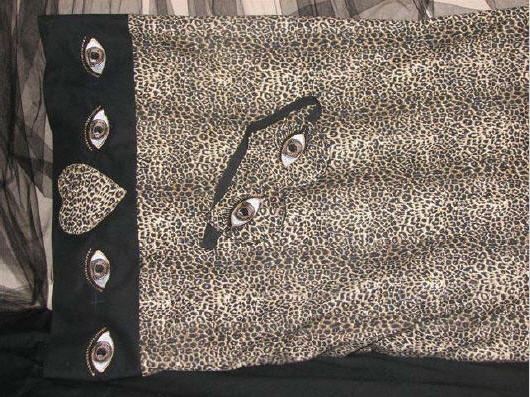
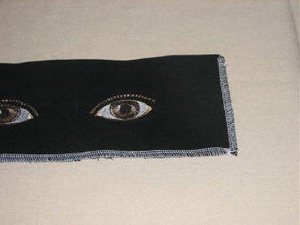
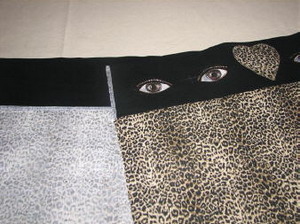
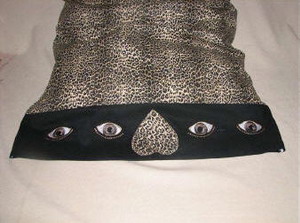
Step 5: Eyes finished. NOTE: If you want your eyes facing the pillow leave as directed. If you want the facing out, make sure to flip the fabric so the fold is closest to you and not away from you.
|
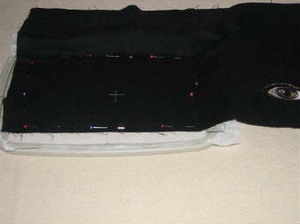
Step 6: Now embroider another set of eyes on the other marking. In the same way as Step 4.
|
|

|
|
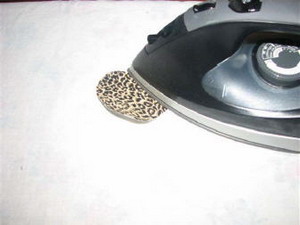
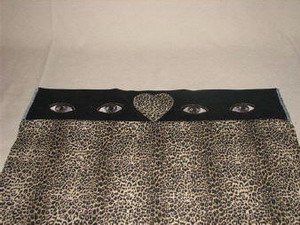
Step 7: Making an appliqué heart ‐ Take a scrap piece of coordinating fabric and draw the heart shape. Fuse both pieces of fabric and double side fusible stabilizer together. Cut out the heart shape.
|
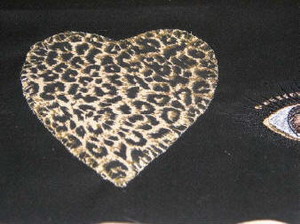
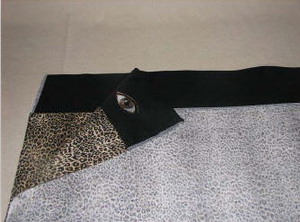
Step 8: Place the heart on the center of the pillow case and iron, fusing in place.
|
|
|
|
Step 9: Add a blanket stitch to the edges of the heart to add some “bling” and help hold it in place.
|
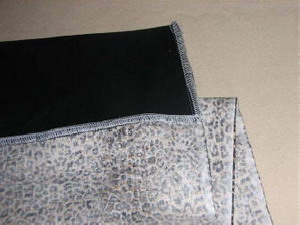
Step 10: Serge all raw edges of both pieces of black fabric.
|
|
|
|
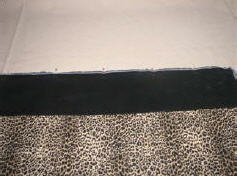
Step 11: Cut 2 pieces of leopard fabric or coordinating fabric 20 ½ inches x 28 inches. This is the main body of the pillow case. Lay the finished piece of black fabric folded edge down and raw edges matching. Pin in place and sew a 1/4 inch hem.
|
Step 12: After hem is sewed. Open top and press. The hem should be facing down on wrong side of fabric. Repeat Steps 2‐11 with the other 10 x 20 ½ black fabric and 20 ½ inch x 28 inch coordinating fabric to make the other side of the pillow case.
|
|
|
|
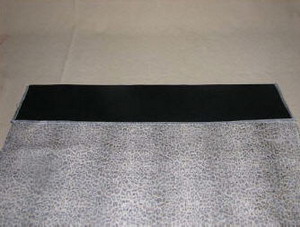
Step 13: Here is the wrong side of pillow case with pressed hem down.
|
Step 14: You now have a front and back panel to the pillow case.
|
|
|
|
Step 15: With right sides together, pin the seams in place, leaving the top open.
|
Step 16: I used white thread in my serger so you could see it better. You can use black. I sewed all raw edges together with a ¼ seam allowance.
|
|
|
|
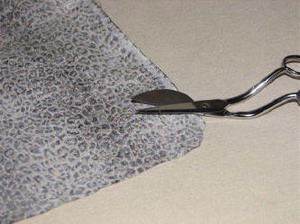
Step 17: Trim the corners but be careful to not cut the threads.
|
Step 18: Serge all raw edges for more reinforcement.
|
|
|
|
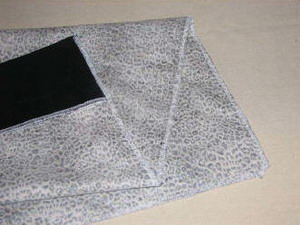
Step 19: Turn pillow case rightside out. Using a crochet hook or like object, push the corners out to give a nice square edge. Press the seam flat.
|
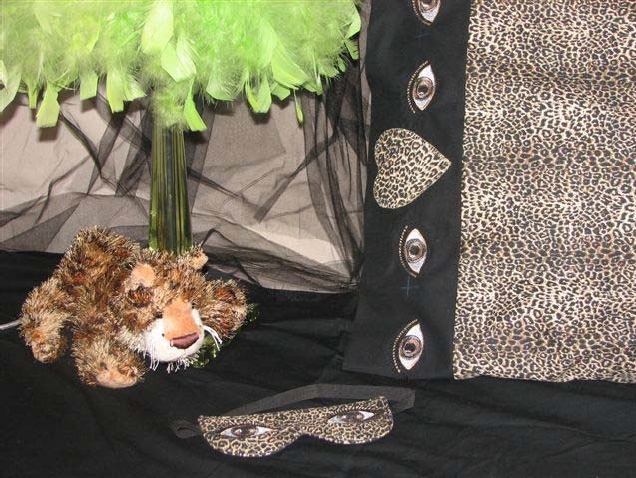
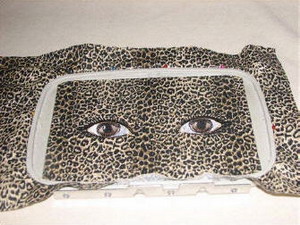
Step 20: Finished pillow case.
|
|
|
|
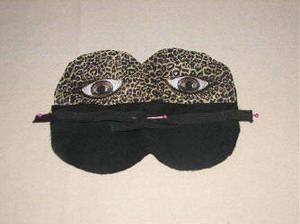
Sleep Mask – Step 1: Hoop 8 inch x 10 inch leopard fabric with tearaway stabilizer. Embroider the eye design twice.
|
Step 2: Eyes finished. Remove fabric from hoop and remove excess stabilizer.
|
|
|
|
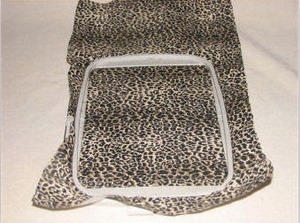
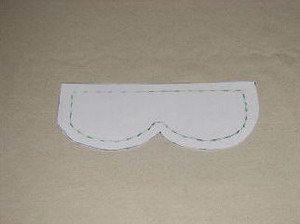
Step 3: Using the included sleep mask template, print it off on an 8 x 10 piece of paper and cut along the solid lines.
|
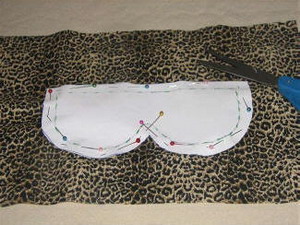
Step 4: Center the sleep mask over the eyes and pin in place.
|
|
|
|
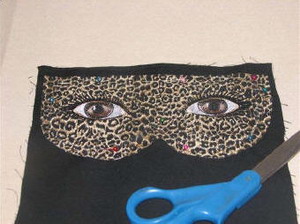
Step 5: Cut out the pattern and fabric along solid edges.
|
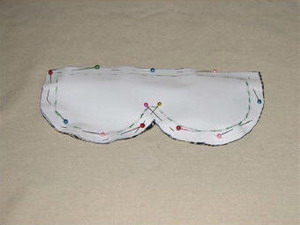
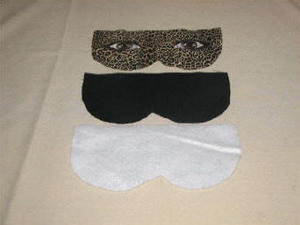
Step 6: Cut out 1 piece of black fabric with the sleep mask pattern.
|
|
|
|
Step 7: Cut out one piece of insulbrite or batting with the pattern also. You can use whatever you like. I like the insulbrite. I can put the sleep mask in the freezer and it will retain the cold or heat it with the iron and it will retain the heat. So this helps with headaches.
|
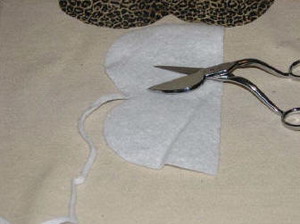
Step 8: Cut off ¼ inch of the insulbrite all the way around the mask.
|
|
|
|
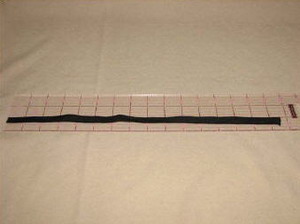
Step 9: Cut one piece of elastic. My elastic is 15 inches long, but it is for a child. The best way to measure what you need is to take a piece and wrap it arond the back of your head starting at one temple working to the other. This will be a prefect fit.
|
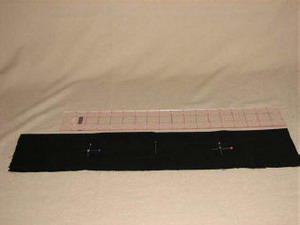
Step 10: Pin the elastic ¾ inch from the top of the mask. Leaving ½ inch to 1 inch hang over the edge. I folded over the center of the elastic and pinned it in place to keep it out of the way of sewing.
|
|
|
|
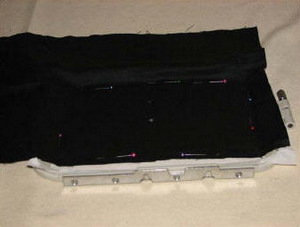
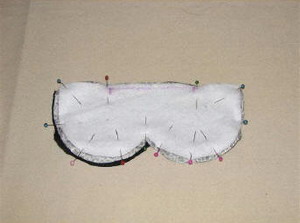
Step 11: Layer all three pieces of the face mask in this order;black one on the bottom, leapord one in middle,and insulbrite on top. The shiny side of the insulbrite should be facing the wrong side of the leapord fabric. Pin all the way around. Leave about 3 inch opening for turning inside out.
|
Step 12: Sew a ½ inch seam around the mask, leaving about 3 inch opening for turning inside out.
|
|
|
|
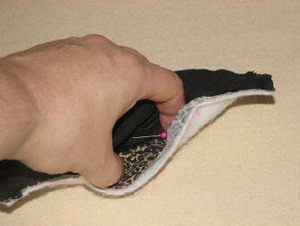
Step 13: Time to turn rightside out. Open the opening and reach in an remove the pin holding the elastic.
|
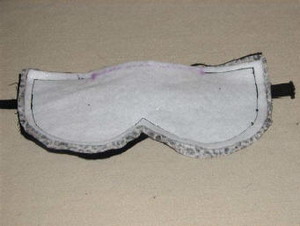
Step 14: Trim off excess fabric all around the sleep mask to ¼ inch and cut notches around curved edges. Pay close attention to the nose area, cutting off as much as possible around the nose.
|

|
|
|
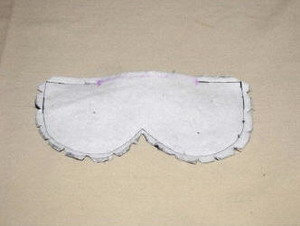
Step 15: I pressed the mask, making sure the opening gets pressed 1/4 inch inside the mask. You can stitch this closed by hand. I stitched it closed with my machine. I ran a stitch 1/8 inch all the way around the mask, but this is optional.
|
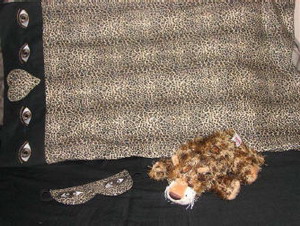
Finished projects!
|


")