|

|
|
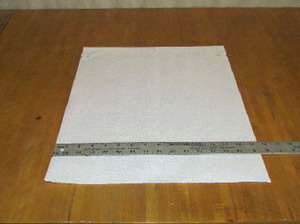
Step 1: Measure your flag iron. Mine measures 15 inches across.
|
Step 2: Cut one piece of the white fabric 15 ½ inches x 36 inches of your choice (or size to fit across your flag iron plus 1/2 inch). I chose Sewpaintable fabric. Follow manufactures directions when using this product.
|
|
|
|
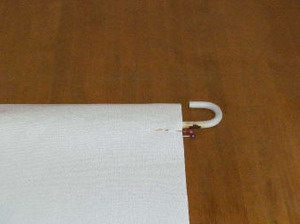
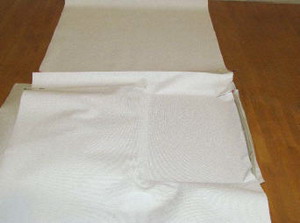
Step 3: Fold the fabric in half and press with a light iron. This will be the top of the flag.
|
Step 4: Place the folded fabric over the flag bar and measure how wide the opening should be. Mine is 2 inches. Place a pin on each side or use a H2O fabric pen to mark it.
|
|
|
|
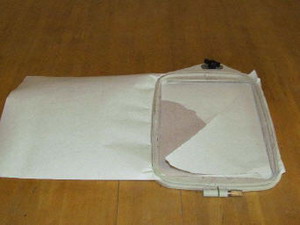
Step 5: Hoop sticky back stabilizer. Score and tear away the paper.
|
Step 6: Place the fabric where you are going to embroider first and smooth in place. This should be placed under the 2 inch mark.
|
|
|
|
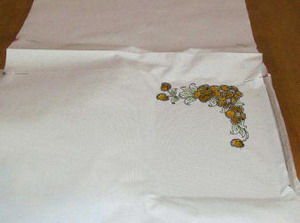
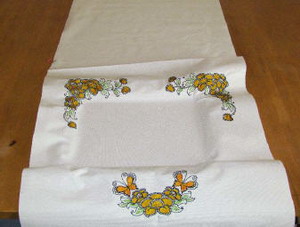
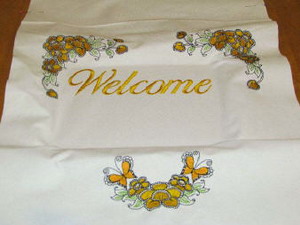
Step 7: Embroider the design. When finished, remove the fabric from the hoop and remove the excess stabilizer from the back of the fabric.
|
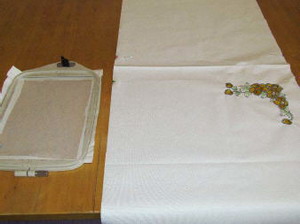
Step 8: Hoop stabilizer again as before. Mirror the embroidery image with your embroidery software or machine. Place the opposite side of the fabric on the hoop and smooth in place.
|

|
|
|
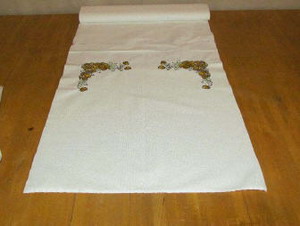
Step 9: Embroider the design. Remove the fabric from the hoop and remove the excess stabilizer from the back of the fabric.
|
Step 10: Press with an iron.
|
|
|
|
Step 11: Next we are going to embroider the bottom design. Center the design where you like- towards the bottom. Be sure to leave 2 inches or so for sewing seam allowances, etc…I have mine centered with my hoop 5 inches from the bottom.
|
Step 12: Hoop the sticky back stabilizer as before and place the fabric where desired. Smooth in place.
|
|
|
|
Step 13: Rolling the fabric might be necessary when placing on the machine.
|
Step 14: Embroider the design and remove the excess stabilizer from the back.
|
|
|
|
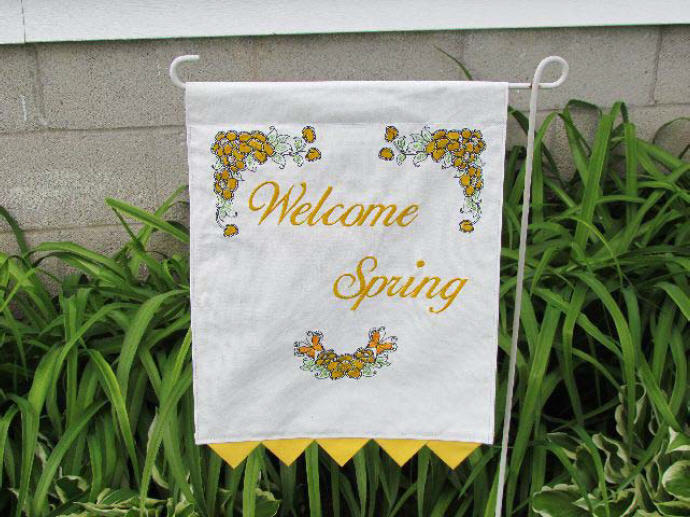
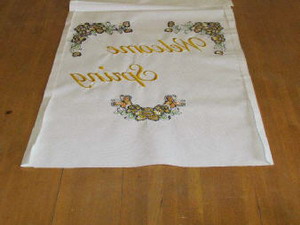
Step 15: With your embroidery software create the message desired. “Welcome Spring” are the words I chose. I hooped close to the left side for “Welcome” and more to the right side and slightly under the welcome words for the “Spring”. You still have room if you want to add a name or an address to the bottom. You can also embroider on the other side.
|
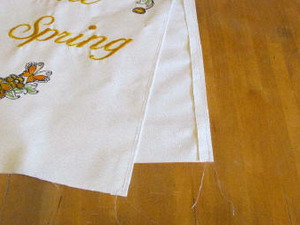
Step 16: On the back side of the fabric, press in the sides ½ inch on both long sides.
|
|
|
|
Step 17: Sew ¼ inch seam on both sides to hold the hem in place.
|
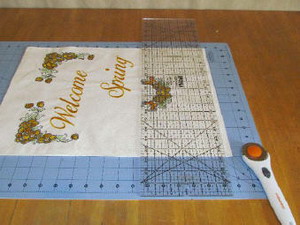
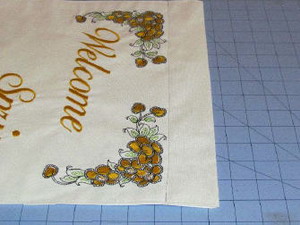
Step 18: Square up the flag bottom using your mat and rotary cutter.
|

|
|
|
Step 19: Press the bottom edges up ½ inch on both pieces.
|
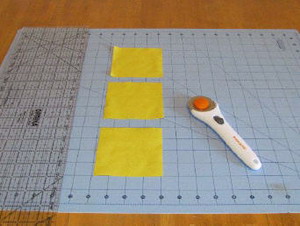
Step 20: Cut five 3 inch x 3 inch squares of the coordinating fabric (three shown in image).
|
|
|
|
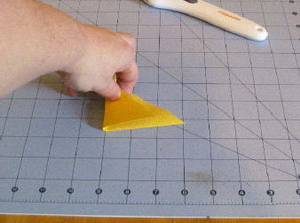
Step 21: Fold and press each square in half to form a triangle, then press again to make a smaller triangle. These are the prairie points on the bottom of the flag.
|
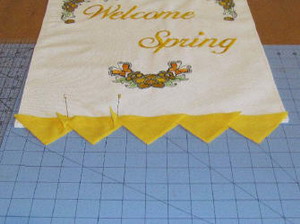
Step 22: Space the points across the bottom of the flag. Place one into the next one about ½ to 1 inch.
|
|
|
|
Step 23: Place the points between the 2 bottom pieces of fabric and pin in place.
|
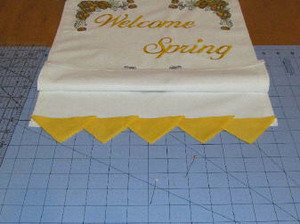
Step 24: Sew across the top of the flag across the 2 inch mark. Sew down along both sides 1/8 inch from the edge starting at the 2 inch mark. Make sure to back stitch. Sew across the bottom.
|