
|

|
|
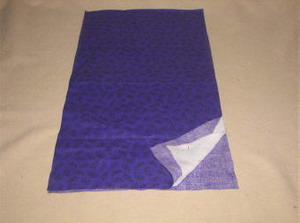
Step 1: Cut two pieces of fabric - 10 x 18 inches.
|
Step 2: Cut one piece of felt or batting (warm & natural) 10 x 18 inches.
|

|

|
|
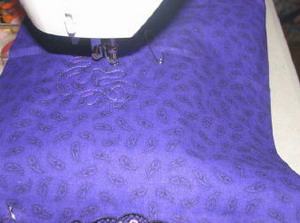
Step 3: Hoop tear away stabilizer and fabric together. The fabric should be about ½ inch away from the edge of the hoop as shown. Make sure that your design is closer to the edge of the fabric and not centered. This will ensure that the design is on the top of the bag.
|
Step 4: Embroider the design.
|

|
|
|
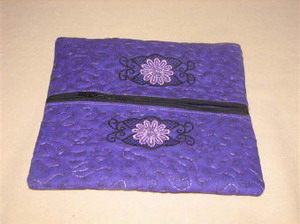
Step 5: Repeat on the other end so you have the embroidery on both ends of the fabric.
|
Step 6: Sandwich the felt of batting in the middle of the two pieces of fabric, wrong sides together.
|

|
|
|
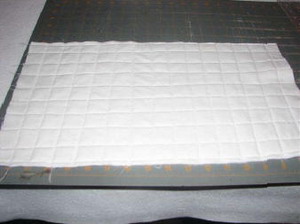
Step 7: We are going to free motion quilt this fabric. Using safety pins, pin through all 3 layers. 4-6 inches apart. You can choose to either stipple quilt or square quilt.
|
Step 8: Free Motion stippling - Using your darning or embroidery foot, start in the center, working left to right. Moving slowly, make puzzle-like shapes all over the fabric. Never crossing over the stitches you already made. Be sure to back stitch at the beginning and the end of the stippling. Once you have covered the right side you can stipple your way to the left side until finished. Continue to Step 11.
|

|
|
|
Step 9: Here is what your finished stippling will look like.
|
Step 10: Square quilting line - With your walking foot or regular sewing foot, sew 1 inch lines down and across the fabric, as shown in the picture.
|

|

|
|
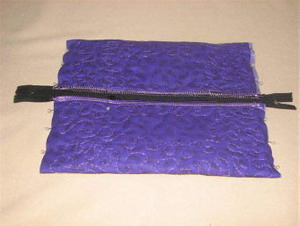
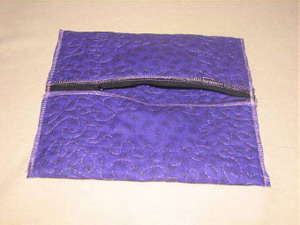
Step 11: After you have completed the stippling or the square quilting of the fabric sandwich, place the zipper face down onto the fabric along the edge. Pin the zipper to the edge of the fabric.
|
Step 12: Sew and serge or zigzag the edge of the zipper to the fabrics from one edge of the fabric to the other.
|

|

|
|
Step 13: Fold the zipper over and stitch close to the zipper. Stay on the fabric edge close to the zipper. This will secure the fabric to the zipper and hold it back out of the way.
|
Step 14: Fold the other side of the fabric over and line it up with the other side of the zipper. Pin in place. Sew and zigzag edges in place like the other side.
|
|
|
|
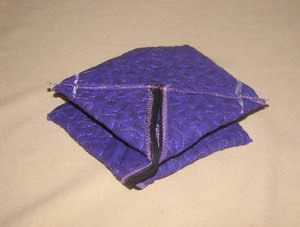
Step 15: Lay the bag out flat so the finished zipper is in the middle, wrong side up. Pin the ends seams of the fabric closed and open the zipper to 3/4 the way. I've marked the opening with a pin in the picture.
|
Step 16: Stitch a straight line across the fabric through each end of the zipper. Cut the extra zipper ends off and zigzag the zipper ends closed. Zigzag or serge the side seams from one end to the other.
|
|

|
|
Step 17: You can turn it inside out and take a look to see how you've done. Then turn it back wrong side out, so we can finish the corners.
|
Step 18: Pinch the corners and mark 1 inch with a fabric pen. Making sure the line marked is following the same direction as the zipper; sew a straight stitch across the line.
|
|
|
|
Step 19: Repeat Step 18 for all four corners.
|
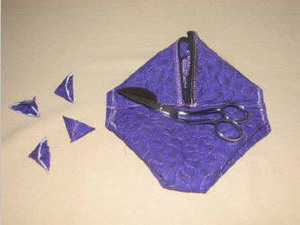
Step 20: After stitching with a straight stitch, cut all four corners off.
|

|

|
|
Step 21: Zigzag or serge the clipped corners to give it a finished look.
|
Step 22: Turn bag inside out. All finished!
|


")

